Stop Buying Yoto Cards: How We Use Just 7 MYO Cards for Everything
Our Yoto Mini card organization system - 2.0
This post may contain affiliate links, which means I may receive a commission for purchases made through these links. As an Amazon Associate I earn from qualifying purchases. I will only recommend things I have personally used unless otherwise stated.
Before jumping in, here are the links to all the materials I used. They are the same as the old post, I just did a better job at applying the stickers and I added the holographic film.
You'll also need a printer and scissors for this project.
Here are the printable covers I made. Feel free to save them and print them. They are just the right size for this project because they overlap the Yoto cards enough to cut off the excess without needing to line them up perfectly with the edge of the cards when you stick them on.


Upgraded Yoto Mini Card Ring Labels: More Durable & Aesthetic
If you’ve seen my previous post about organizing Yoto Mini cards on a ring, you know I love keeping things neat and accessible for my kids. Well, I’ve recently upgraded the labels to make them even better! They’re more durable, look amazing, and hold up better with daily use. In this post, I’ll walk you through why I decided to make this change and how it’s working for us.

What Wasn’t Working With the Old Labels
My original labels were made with plain sticker paper, and I printed them myself. While they worked well for a while, they didn’t stand up to the wear and tear of everyday use. Within just about two months, the labels started to show watermarks and stains—making them look a bit shabby. They were also one-sided, didn’t cover the whole card, and just weren’t as aesthetically pleasing as I hoped.
What I Used for the New Labels
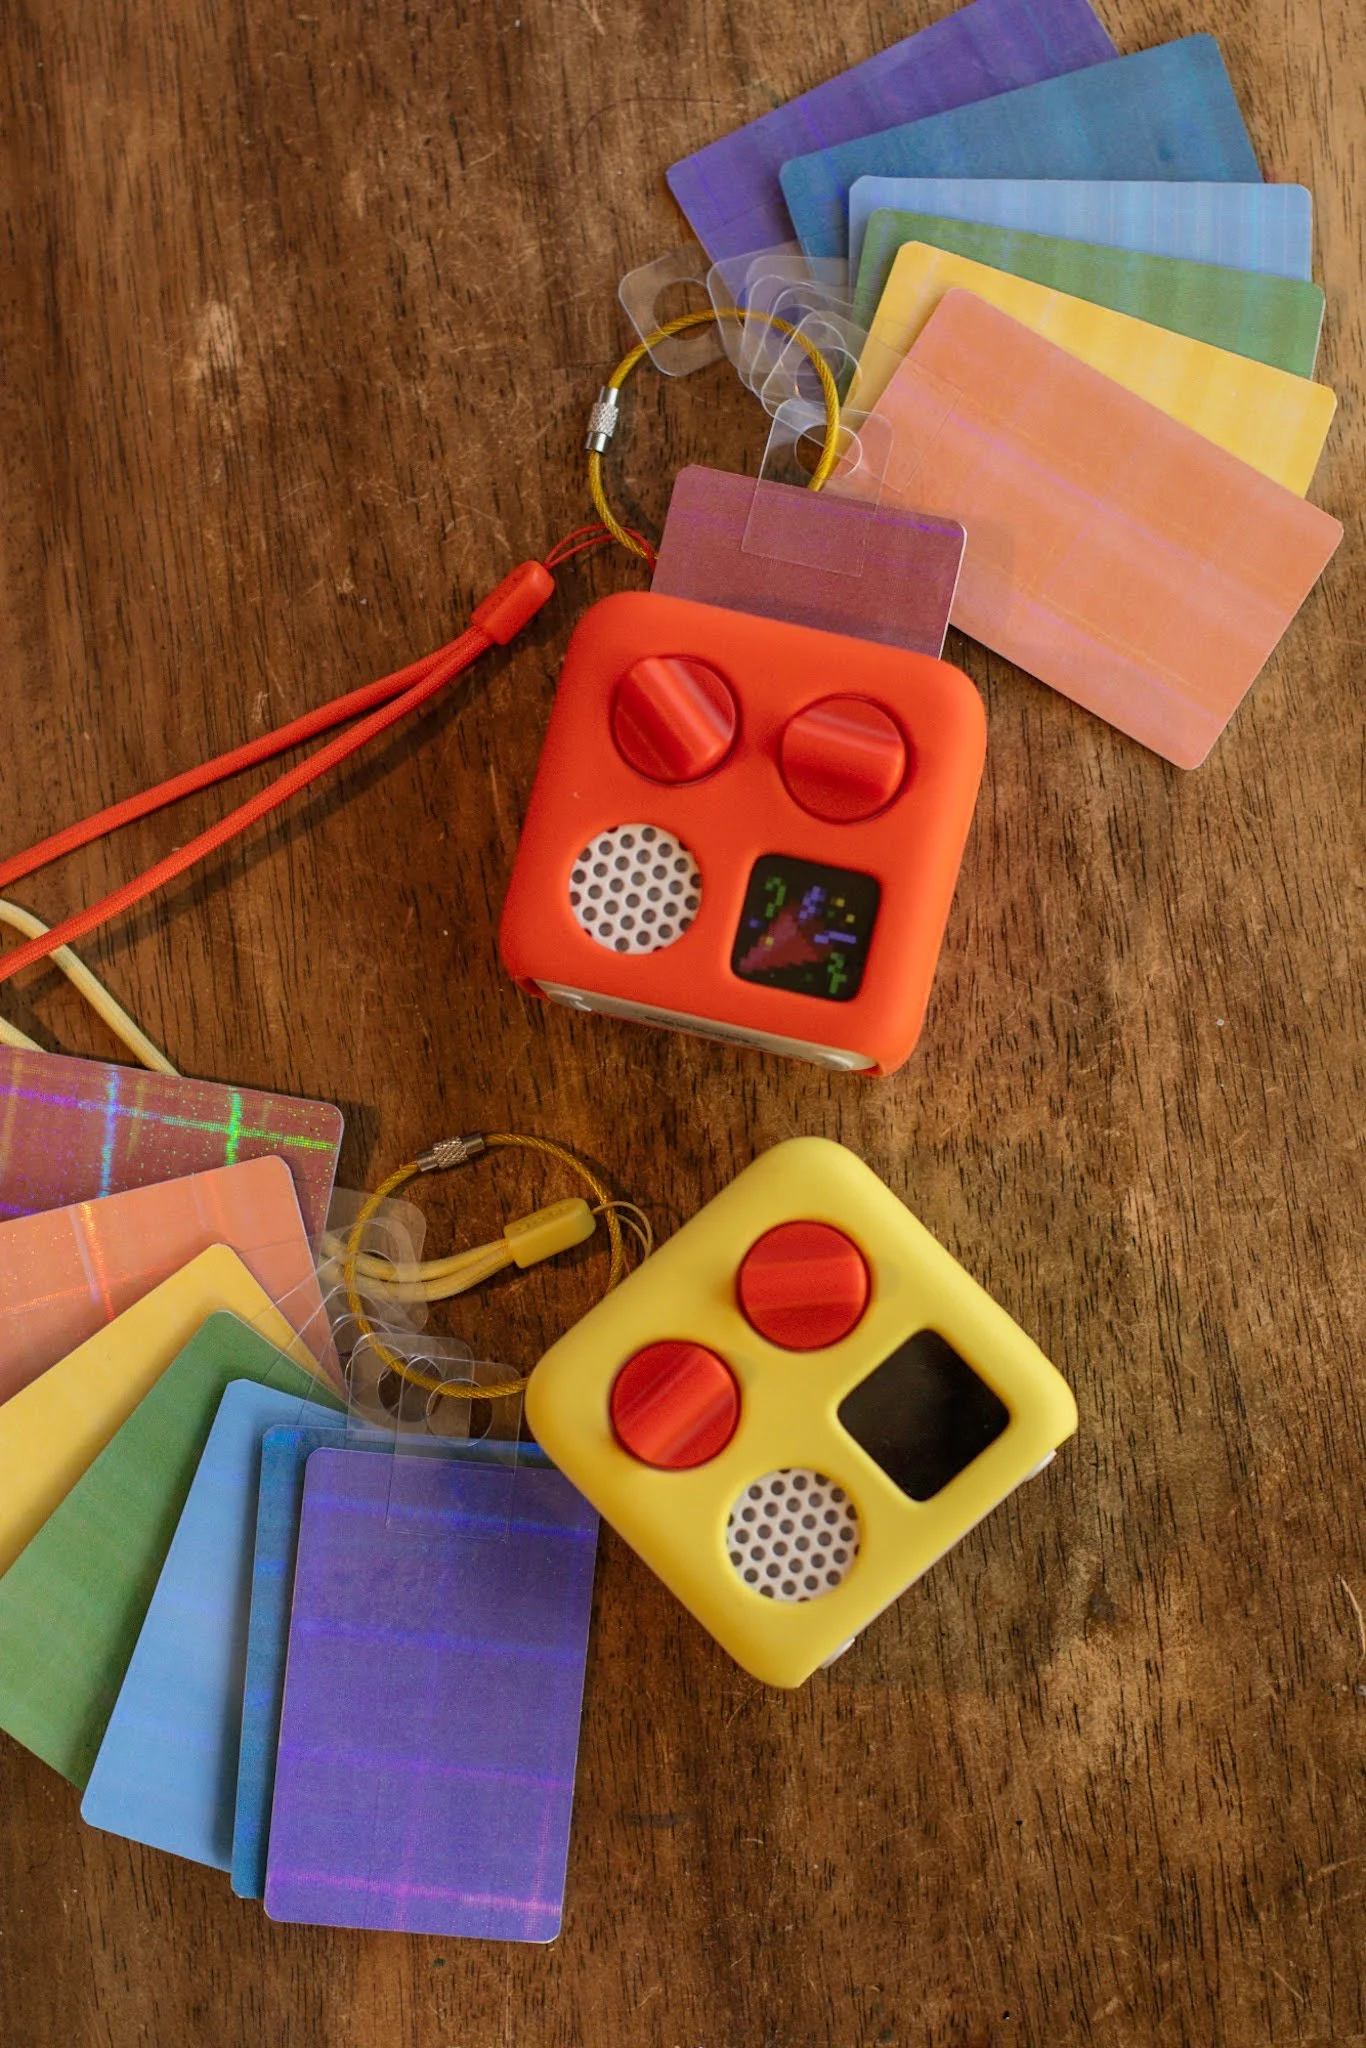
For the new labels, I stuck with the same sticker paper, but I added a holographic protective film to give them a more durable and eye-catching finish. The holographic effect has been a hit with the kids, and it helps protect the labels from stains and watermarks. After applying the stickers, I used scissors to trim them to fit each card, and I added sticky tabs to both sides so I could attach them to a wire ring keychain for easy access.


How They Look Now
The new labels are a huge improvement! Not only do they look more vibrant and clean, but they’re also holding up much better. The holographic design makes them pop, and the extra durability means I don’t have to worry about them wearing out as quickly. The kids are really enjoying the new look, and it’s been super easy for them to recognize which card is which.
Would I Do Anything Differently?
I honestly think this new system has perfected the concept I started with. The simple labels I had before were functional, but the upgrade adds that extra durability and style. No changes needed at the moment!
Closing
I’m really happy with how this upgrade turned out, and I’m always curious to hear how other people organize their Yoto cards. If you have any tips or tricks, feel free to share them in the comments! I’d also love to know what systems have worked best for you.
If you’re interested in making your own Yoto card ring system, feel free to check out the links I’ve added to the materials I used. Stay tuned for more Yoto-related projects in the future or check out the other blog posts below!